TABLE OF CONTENTS
INTRODUCTION
I had the pleasure of attending Doug and Dan Stewart's AFS fabric covering seminar in October 2005. I can't believe how much I was able to learn in one long weekend. I have never covered a full size aircraft before, only a lot of model R/C planes with Monokote. After the weekend was over, I had complete confidence that I could tackle covering my experimental Super Cub without sweating it. The AFS process is marvelous. I was attracted to AFS because it is a completely water based product (through fill coat) and waterborne for the Polyurethane top coat. With all that we know about solvent based products - aren't we smart enought to take enough precautions so we can live a full life? It is fact that polyisocyanates are DEADLY. I want to avoid them with a passion.
For those historians, this AFS process is reminiscent of the old Blue River process that is now defunct and earned a horrible reputation for cracking top coat. AFS took what could have been a great thing and ELIMINATED the problems of Blue River. Now you can have your cake and eat it too! AFS should have their own STC soon. From what I am told, 337s are no problem because this process was previously part of the Ceconite STC. Here is another tidbit - every single classmate that previously used Poly Fiber, was delighted with the AFS process and wished they knew about it before they dabbled with Poly Fiber. They were especially fond (as was I) of CecoBond cement and its excellent properties.
Thanks again to Doug and Dan who were excellent teachers and full of knowledge (and great plane stories!). And I cannot forget to thank Marjie Stewart, who really makes the class feel organized, professional, and uh....delectable (does daily donuts and homemade apple cobbler sound good?).
Be sure to contact Stewart's Hangar 21 if you have any specific technical or process questions about the AFS covering system.
PREPARATION
- Before beginning any fabric covering procedures make sure to wash your hands to clean any grease or dirt that may contaminate the process.
- Get the workshop temperature to 75°F to
work with any AFS products.
- Pour a small amount Cecobond glue into disposable
cups. After wetting the brush with glue - keep in glue when not in
use to prevent brush from drying stiff.
- Have small 2 in. standard paint brush (not foam) for Cecobond.
- Have 1 ply blue shop towels ready.
- Preheat irons (if applicable for the step)
to 250°F. Important: make sure irons were previously calibrated using
temperature measuring device.
- Have sharp scissors and single edge razor blades handy.
- Have a rotary pinking shear handy.
- Using electrical tape, protect any hinges/bushings completely.
- Have sanding belt eraser handy.
- Have a soft lead pencil (dull) handy.
- Glue cup holder. Take a dixie cup, cut in half. Glue the bottom half with CecoBond to a small paper plate. Insert full size cup with glue into the half cup. Throw away cup when not needed.
COVERING PANELS - First side
- Wash hands.
- Preheat small iron to 350°F.
- Determine which side of surface you will
cover first. Normally you will cover a bottom surface first and then
the top as to hide any extra tapes or overlaps from sight. These instructions
assume we are covering the bottom first.
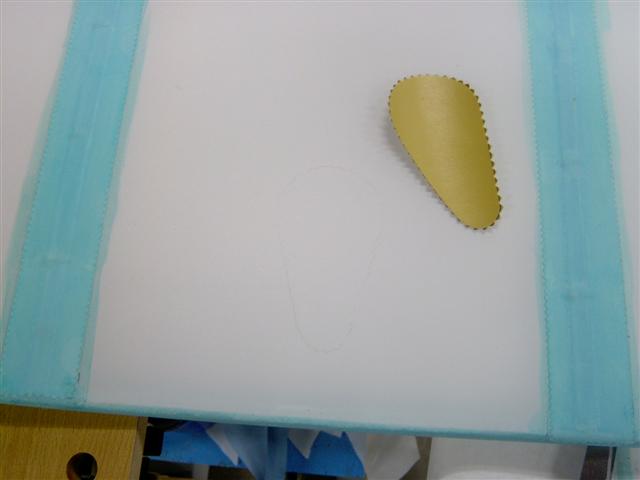
- Apply Cecobond glue (from this point forward
Cecobond will be referred to as glue) to the opposite side of the surface
to be covered. Put a medium coating approx 180° around the surface on the opposite side to cover. See
Figure 1.
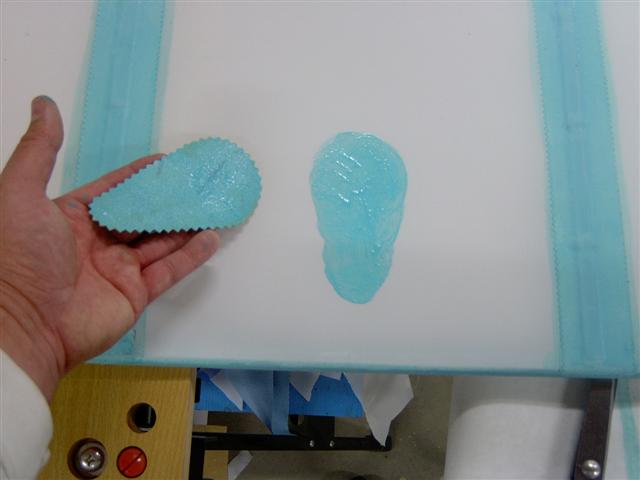
- Lay control surface onto fabric panel, center as needed.
- Roll up edges by pulling and rubbing to
tack the panel to previously glued surface. In this step you are using HAND pressure and rubbing friction to allow the fabric to temporarily attach to the glued areas. Pull
out any slack.
- Now, using iron slowly work iron around
perimeter and iron down the fabric to the glue areas. Iron partially
into the inner perimeter. Pull on fabric while ironing to remove puckers
and bring taught. Repeat on all sides of the perimeter.
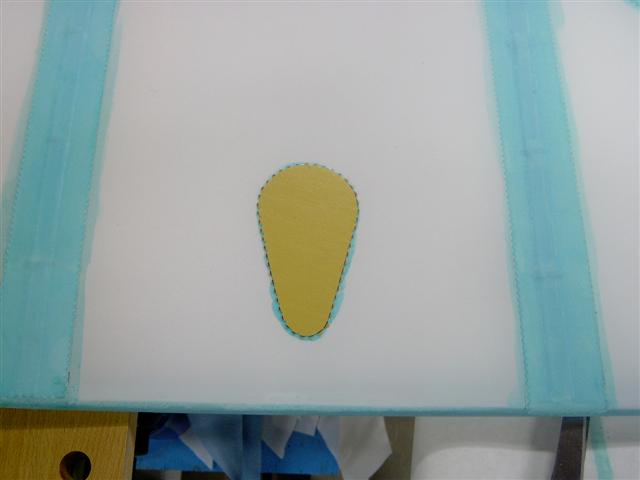
- Using a sharp pair scissors, cut along the
inside perimeter to remove excess fabric. Allow enough material so
the fabric will wrap around to approx 270° from the opposite side.
- Continue ironing down fabric to inner perimeter, working out wrinkles in radius corners slowly without creasing.
- Apply glue to the perimeters once again,
this time soaking into the fabric and WIPE OFF with blue shop towel.
Work in 6-12" sections at a time as to prevent the glue from setting
up and makes wiping difficult. Through away towel when it becomes saturated
with glue.
- After the glue has become mostly dry, use
the sanding belt eraser to remove any glue drops, globules, streaks,
etc. Incidentally, the eraser is also used to remove glue from your hands and clothes! Clean up perimeter with eraser and remove any high points. These
will show up on a finished surface if they are not cleaned up.
- Do your first SHRINK. Using large iron at
250°F, shrink the whole panel. Begin with center bay (if applicable), then alternate side bays. Bring up all the fabric to the required first shrink temperature of 250°F.
When making passes with large iron try to go 90 degrees to the previous
pass to cross-coat. Go around edges and shrink any puckers. Work out
bubbles on perimeter with small iron if necessary.
Back to top
COVERING PANELS - Second side
- Wash hands.
- Set the small iron to 250°F
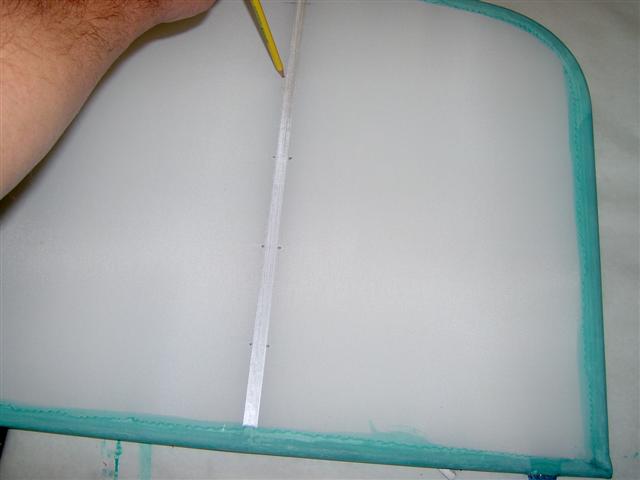
- Using your finger as a guide, draw a pencil
(no Sharpies!) reference line approx 1" away from the outer perimeter
of previously covered side. No need to be super precision here, just
make a line to establish a glue boundary.
- Apple glue around perimeter and all the
way to the previously made 1" line. DO NOT WIPE OFF glue in this step.
Just brush on glue and let dry tacky.
- Lay surface onto the pre-cut fabric panel. Roll the fabric around the perimeter and overlap up to the pencil line. Use
hand rubbing friction to pre-tack the panel to the perimeter, removing
any excess wrinkles bringing fabric panel taught.
- Begin lightly ironing around perimeter and iron down fabric towards previously marked pencil line. On radius corners, see next step.
- For radius corners, set iron to 390°F. You want to HEAT FORM radius corners by using the extra hot iron to pre-form the overlap for glue down. Work radius corners slowly by pulling and shrinking at the same time. Shrink and smooth all the way to the 1" pencil
reference line. Try not to touch the underlying fabric surface to prevent
premature shrinking there. In this step you are simply forming the
overlap corner.
- Once satisfied with the heat forming and
the small iron still set to 390, tack down the outer perimeter firmly
establishing a 1/16" line of penetration of heat to glue. This penetration should look like a shiny dark line where the heat has permeated the glue. Only
iron the very outer perimeter. See photo.
- On the overlap which goes to the glue line,
transfer the 1" pencil border by redrawing the line on the overlap
you previously heat formed.
- Pull up the heat formed overlap and using
a pair of rotary pinking shears, cut along this newly drawing 1" border
line to remove the excess fabric. Try to be as neat as possible because
this cut will lightly show through (under tapes) on finished surface.
- Set iron back to 250°F.
- After cutting off excess, iron the overlap
back down. Smooth out and remove any wrinkles or creases.
- Apply glue on TOP of overlap. Work glue
in thoroughly and WIPE OFF. Work in 6-12" sections at a time to prevent glue from setting up. When wiping off pinked surfaces, be careful not to wipe too aggressively against the pinks. This may cause pinks to lift up and fray, which may continue to lift up in the future. Try
to bias your wiping outwards with the pinks.
- After dry, set iron back to down 350°F and
work out any puckers or wrinkles on the perimeter. Run the tip of the
iron quickly over the pinked edges to iron any lifted spots down.
- Use eraser to remove excess globs or drops of glue.
- First shrink. Using large iron at 250°F, shrink the second side. Starting at center then alternating bays. Move large iron over entire surface evenly and bring all fabric up to 250°F.
- Set large iron to 300°F.
- Second shrink. Repeat panel shrinking as
described above at 300°F. DO BOTH TOP AND BOTTOM SIDES at this time.
Make sure all fabric gets up to temperature.
- Set large iron to 350°F.
- Third shrink. Repeat panel shrinking at
350°F. DO BOTH TOP AND BOTTOM SIDES. Make sure all fabric gets up
to temperature.
Back to top
RIB STITCHING
Stuff Needed:
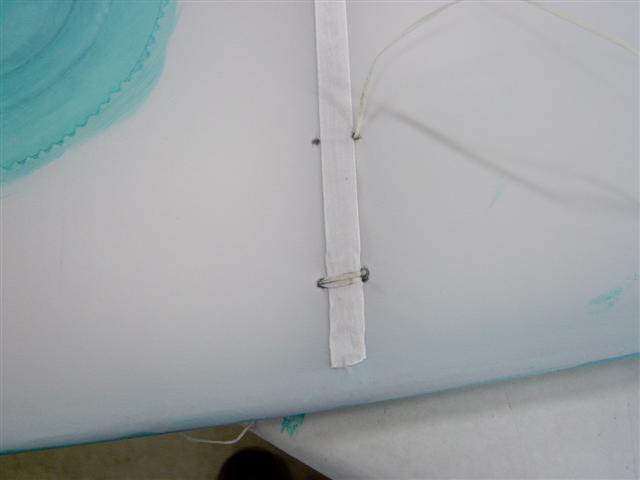
- Flat, waxed rib lacing cord.
- Rib stitching needle (sharpened brass welding rods make nice homemade
needles, 3/32-1/8". Hammer down one side flat, drill hole for lacing).
- Pencil.
- ½" Reinforcing tape.
Consult AC 43.13-1B for proper rib stitching methods, spacing, and approved knots. The Beechcraft
Staggerwing knot is the most easiest to use for experimental, and arguably certified aircraft as well. Don't Staggerwings fly at 200mph? Certified aircraft may have specific approved knot that is required for airworthiness, such as modified Seine.
- Wash hands.
- After determining rib stitch spacing and
locations, using a dull pencil mark locations. The first stitch is
normally started 1" from beginning of run. Draw a perpendicular line approx 1" across
where each rib stitch location is. This will aid in finding location
later.
- Lay down ½" rib stitch reinforcing tape across all ribs to be stitched. Cut off the tape approximately where it intercepts the cross structure. Make a neat cut here because it will show through finish coat. If doing "dollar patch" rib stitches, a 1" strip
of reinforcing tape should be used on each dollar patch location.
- Using a sharp pencil or awl, pre punch all
your rib stitch holes in the fabric, immediately adjacent the ribs. Pencil is better because it leaves an easy to see hole. Use your previously made 1" pencil
lines as guides.
- On wings, the first stitch is usually started
with double square knots and double half hitches on both sides of the
rib before the run begins. On tail surfaces, ailerons, and flaps, this is optional. See
AC43.13-1B or a fabric covering manual for specific instructions.
- Proceed with rib stitching process as described by AC43.13-1B.
Back to top
INSPECTION RINGS
- Wash hands.
- Pre locate all inspection hole locations. If you covered the wing bottom first, it is easy to determine the locations from the top. Draw the locations with a pencil on the inside of the wing. The
pencil will be visible from the outside.
- Prepare inspection rings by removing any sharp molding burrs.
- Prepare correct sized patches for rings. A large coffee can is just the right size to use as a template. Use rotary pinking shears to cut patch from Ceconite. Do NOT cut patches from scrap Ceconite where there are creases, because they WILL show. These patches will not be shrunk.
- Using the ring as a template, draw the inner and outer ring on the surface.
- Apply CecoBond glue inside the newly drawn region where the ring attaches to the fabric.
- Apply glue on the mating surface of the ring.
- Set ring onto glued fabric surface and give a slight twist to seat in glue bed.
- Carefully wipe off any excess glue from before it becomes tacky.
- Allow CecoBond to set up for several minutes.
- Brush on glue in center of ring, on ring,
and approx ¼ - ½" outside of ring. LET DRY several minutes.
- Set appropriate sized patch on inspection ring, center as necessary.
- Use your fingernail and run along the inner and then outer perimeter of ring to form fabric. Work out any wrinkles.
- Carefully use small iron at 250°F tip to go over the area you previously did with your fingernail to tack the patch in place. Do not shrink the patch! Use
only the very tip of the iron.
- Apply a good coat of glue over the entire patch and WIPE OFF gently.
- You're done!
Back to top
TAPES
Stuff Needed:
- Pinked (or straight) Ceconite tapes, 2", 3" or whatever your plane
calls for.
- CecoBond glue
- Brush
- Surface previously rib stitched (if applicable).
- Wash hands.
- Note: No heat or shrinking in this step.
- Mark rib tape locations with a straight
edge and pencil first. For example, if using 2" tape, draw marks approx 1" on each side of rib and then draw parallel line to rib using straight edge. This gives you a boundary to align your tape and to brush glue. If
rib is not perfectly straight, try to center the tape for best aesthetics.
- Determine order of tape layout for best slip stream performance and aesthetics.
- Pre-cut your tapes for the proper length. They should extend far enough to go under the perimeter tapes.
- Working short 6-12" sections at a time, brush glue down in tape region (pencil boundary), lay the tape on surface and align. Proceed to brush glue over top of tape and then WIPE OFF excess using blue shop towel. Repeat for the next 6-12" until
entire tape is encapsulated in glue and in position.
- Tip: For wings or similar surfaces, it can
be handy to do the first 6" of tape for every rib first. Let glue set up. Then go back and finish off the tapes. This allows you to slightly tug on the tape for a tighter fit. This is especially handy for the upper wing surface to assist the tapes in conforming to the "scallop" that
is between each rib.
- Let dry.
Back to top
PERIMETER TAPES
Stuff Needed:
- Pinked (or straight) Ceconite tapes, 2", 3" or whatever your plane calls for. 3" is
often used for perimeters because of shrinking.
- CecoBond glue
- Brush
- Small iron 390°F
- Wash hands.
- Unlike regular tapes, perimeter tapes go
around an outer surface and fold down on both sides of the surface.
Tail feathers, tip bows, etc. If going around radius corners, it will
be necessary to pre-shrink and heat-form these tapes to achieve a consistent
width perimeter tape.
- Determine length of tape and pre-cut. Use pinked scissors for better look.
- Fold the tapes in half and crease in order to establish a centerline down the middle of the tapes.
- Determine order of tape placement. For example,
if doing a horizontal stab, normally you would want to cover the trailing
edge first. Then the leading edge as to allow this tape to overlap
the rear tape and finish off the edges in a clean manner. It's a personal
choice how to approach this.
- Brush a bead (not too thick) of CecoBond
glue along the perimeter to be taped. The bead should be approximately ¼ in.
Let dry tacky.
- This is a good time to go over any existing
pinked overlaps with the small iron and iron down any raised pinks
and trim any frays. These will show through the tapes if not corrected
now.
- Place the creased tape (with the "V" point
down, ie V where the line below the V is the surface, this will
insure the crease disappears later) around the perimeter. Use the crease
as a centerline guide.
- Tack down one end with the iron (on the ¼" bead). Lift the tape up and pull around surface again to bring taught. Make any necessary adjustments with the tape and then proceed to tack down the entire perimeter along the ¼" glue bead and crease. Press the iron down fairly hard in this region so you can see a dark shiny line on the tape, indicating the glue has permeated through. This
step insures the tape will not get out of position while you heat-form
in the following steps.
- Preshrinking and heat-forming tapes. This
step may not be necessary on perimeters that are straight. For example,
the trailing edge of the horizontal stab or fin. You can elect to not
pre-shrink here and just glue the tape down. Heat forming and preshrinking
tapes is necessary for radius perimeters to insure the entire run is
uniform.
- Using the small iron at 390°F, heat-form and shrink the radius corners, working slowly from each side as to slowly shrink the wrinkles out from the corners. Have patience and keep working the wrinkles. Using the hot hobby iron, come in from both sides of the corner to equally shrink from both sides and assist with wrinkle removal. After the corner is completely wrinkle free and ironed down, proceed to iron down the remaining edges along the perimeter and shrink down for uniformity with the corners. When
done with one side, flip surface and do the same on the opposite side.
- When all the perimeter tapes are down, formed,
and trimmed, proceed to glue the tapes down. Working 6-12" sections at a time, lift up tape on one side. Brush glue under tape, lay tape back down, brush glue over tape and then WIPE OFF excess with blue shop towel. Repeat
for other side of surface.
Back to top
PRE FINISH
Stuff Needed:
- Small iron at 250°F
- AFS Heavy Duty Cleaner in spray bottle, diluted as printed on container.
- Shop towels.
- Using the small iron, go over any raised pinks or edges to iron back down. Go around the perimeters with the iron and work out puckers, bubbles, wrinkles, etc.
- Round over perimeters with the iron.
- CLEAN SUFRACE. Using AFS heavy duty cleaner in a spray bottle, spray the surface lightly (do not soak!).
- Wipe off surface with shop towel.
Back to top
CECOFILL PRIMER - UV BLOCKER - FILLER
Stuff Needed:
- CecoFill, well stirred and strained. Do not shake - will cause foaming.
- 3" foam brush.
- Cleaned fabric surface to be coated.
- 320 grit open-coat sand paper.
- Spray gun equipment
- Clean terry cloths. Note: Don't use tack rags. They leave residue
which will show.
- Wash hands.
- Dip foam brush TIP into CecoFill, using
quick brushing motion, proceed to brush on CecoFill in one direction.
Avoid excess CecoFill and move quickly to avoid any drops of CecoFill
spilling through to the other side. Watch build up on edges, keep
smooth.
- Using the same brush but without adding
anymore CecoFill, brush 90° to your first coat to "knock down" the
CecoFill and get a smooth surface.
- At this point if you have the means, you can repeat on the other side of the surface. It is recommended to do one side at a time of the process for easier handling.
- Allow to dry a few hours or as recommended on container.
- This is another good time to use the small iron to knock down any raised areas. You have to move quick with the iron on CecoFill.
- Repeat the entire brush process a second
time, at 90° to the first, for a total of two brush coats. This completes one brushed "cross-coat".
- Allow to dry overnight.
- Using 320 grit "open coat" sand paper, lightly sand the CecoFill. Easy Kemo Sabe, don't sand through the fabric! Go in between rib stitches. All CecoFill should be a light gray after light sanding. DON'T OVERSAND. The surface should be noticeably smoother. Watch for hidden bracing or wires under surface that may cause you to sand through fabric. Lead with your opposite hand while you sand to detect any hidden stuff before it's
too late.
- Vacuum off or air-blow surface and wipe down with shop towel.
- CecoFill spray coats. Setup your spray gun (Devilbliss Finishline 3 with 1.5 tip recommended) with well stirred and strained CecoFill. No
thinning. Run about 20psi of pressure at gun.
- Spray 2 cross coats (4 total coats) of CecoFill (approximately 10 minutes between each coat).
- Let dry overnight.
- Perform light sanding with 320 grit as explained
previously. Don't oversand!
- Vacuum and wipe with clean terry cloth.
- Last chance to gently iron down any problem areas. Be diligent and only use the tip of the iron here. It is possible to mar the CecoFill if you are not careful. This will show on the finish coat.
- Before painting top coat, blow off surface and wipe with clean terry cloth simultaneously.
- This completes the primer, UV blocking,
and filling steps. If desired during the spray process, you can spray an additional 1 or 2 coats of CecoFill to build up the surface to your liking. 2
spray cross coats should normally be plenty. Think light!
Back to top
AFS Waterborne 2-PART TOPCOAT - FINISH
Stuff Needed:
- AFS 2 part topcoat in your favorite color, mixed, stirred, and strained.
- HVLP sprayer such as DevilBliss Finishline 3, with 1.3mm tip.
- 13cfm @40psi compressor recommended. Tee together two compressors
to bring up your pressure if needed.
- Charcoal respirator.
- Dupont M50 viscosity cup.
- Good spray both or room, wet down floor.
- CecoFilled surface prepared.
- Blow off part and wipe with terry cloth (if not already done).
- AFS Waterborne Topcoat preparation.
- Topcoat is 3 part resin, 1 part catalyst, 1 part water.
- After measuring, stir in catalyst to resin slowly. After stirring for a while notice the Topcoat becoming creamy.
- Start with ½ part water, stir
in.
- Using M50 cup, take viscosity measure. The target is 18-20 seconds.
- Add small increments of the remaining water until correct time achieved. 19 seconds is desirable.
- Spray Gun Setup
- Open fan control all the way to max.
- Adjust pressure at gun (inline regulator) to 20psi.
- Open paint knob approx ¾ from
closed.
- Setup part in spray room.
- Before starting - between each coat, allow the paint to dry to a tacky feel. If you just barely touch the surface with your knuckle a tiny bit of paint comes off. This
should be around 10-15 minutes.
- 1st coat - very light tack coat. Spray edges, then surface. Barely any paint here, just enough to fog coat. Watch "tiger striping" - this
is a no-no.
- 2nd coat - 90° to first, turn up paint control 1/8" turn. Another
light fog coat.
- 3rd coat - 90° to second, turn up paint control 1/8" turn. Paint going on thicker here. Keep moving and don't
lay it on heavy! No tiger stripes! Point of no return here if you have
stripes.
- 4th coat - 90° to third, turn up paint control 1/8" turn
again. Starting to get very close to a finished surface. Almost acceptable
to stop after this coat.
- 5th and final coat, 90° to fourth.
Remember to keep moving and no heavy coat!
- This completes a total of 2 ½ cross coats.
- Allow to dry overnight.
- Flip parts over (if applicable) and repeat for the other sides.
- Allow to dry overnight before applying masking tape and trim coats.
- YOU'RE DONE!
Back to top
CLEANUP
- Everything cleans up with water!
- For the 2 part Topcoat - clean with water but then final cleanup with laquer thinner. Spray out gun with laquer thinner.
LINKS
Back to top
© copyright 2005 Christian Sturm - www.supercubproject.com
|
| Click any photo to enlarge |
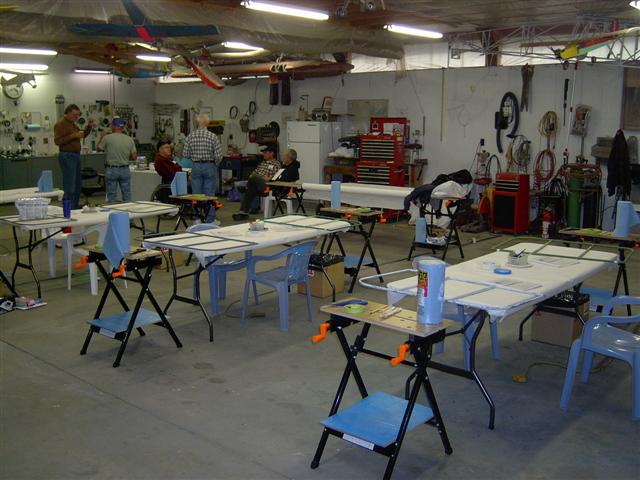
Stewart's Hangar! |

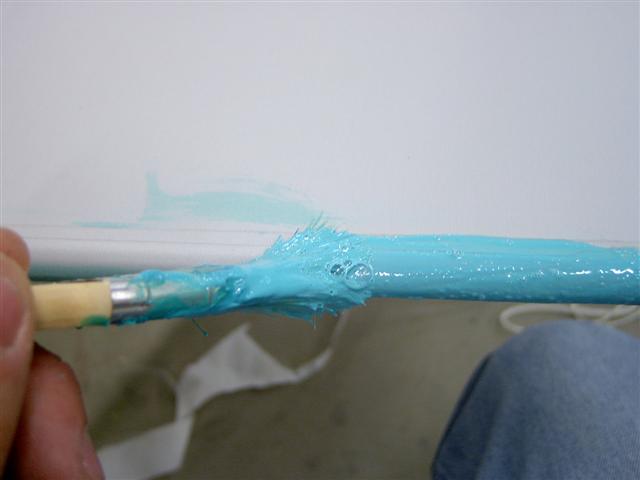
CecoBond glue is so good it needed it's own photo! |
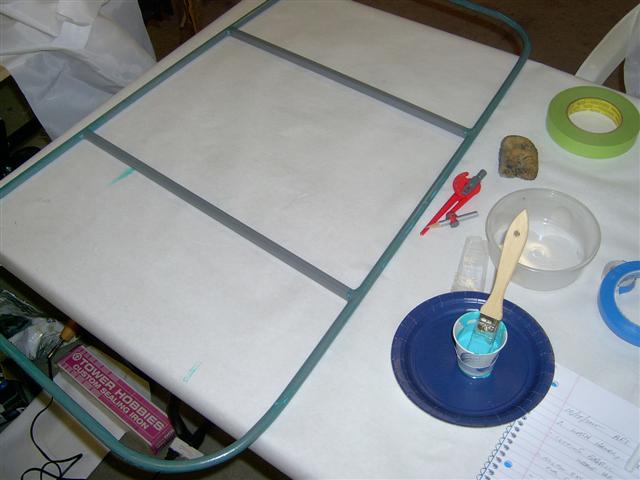
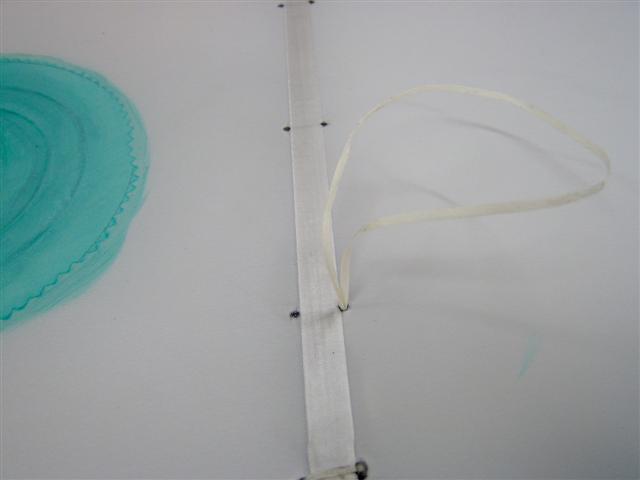
Covering first panel - apply glue to opposite side to be covered. Note the nifty glue cup holder! |
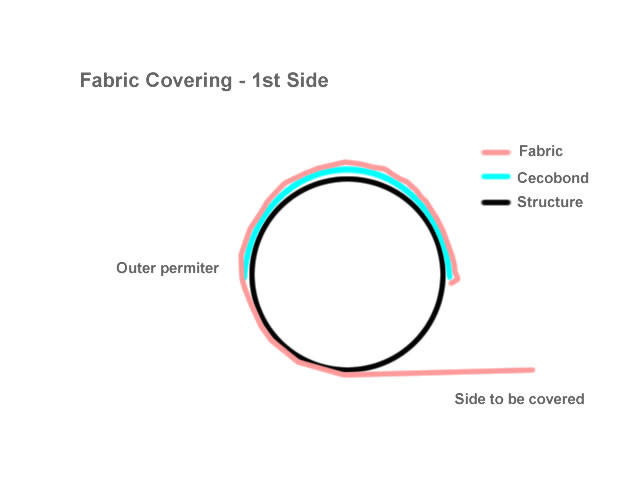
Figure 1. Diagram of glue application for first panel. |

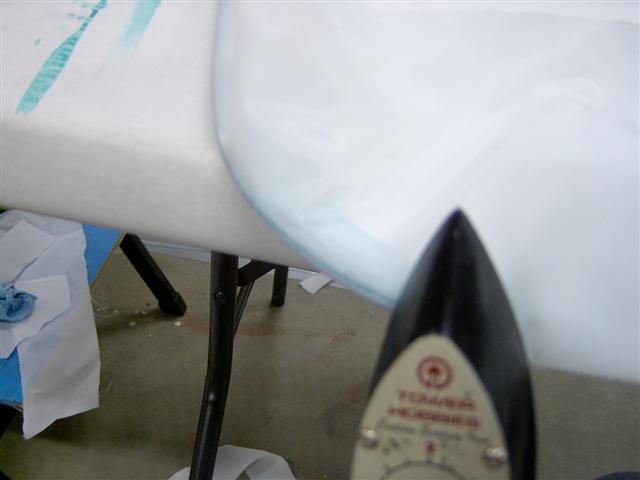
Hinge protected with vinyl tape. Glue applied to frame. |

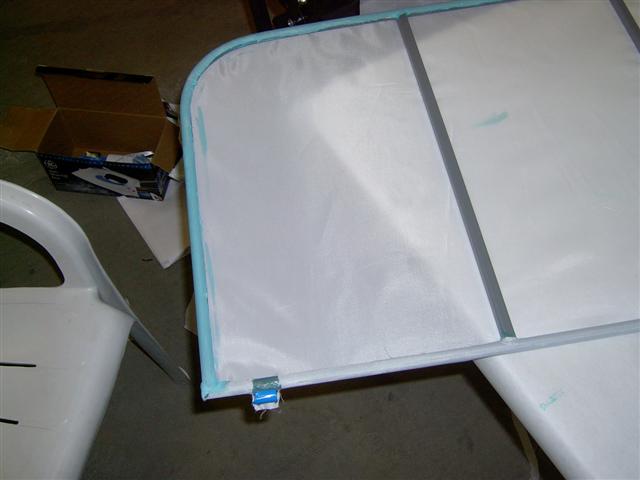
First fabric panel in place and wrapped over frame. Use hand friction
to tack fabric down. No clothes pins needed! |
First panel trimmed, applying glue for second side. |
Glue applied for second side. |

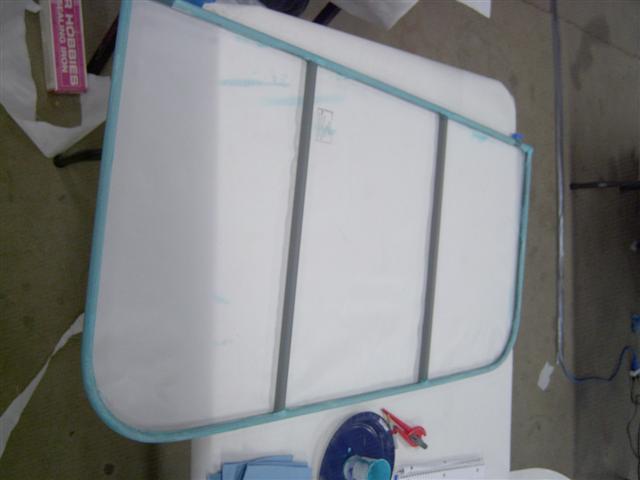
First side is shrunk to 250F here. Making pencil reference line 1" or so from edge. |
Applying glue for second side - up to the pencil line made above. |
Ironing second panel in place. Note the shiney dark line where the
glue is being heated well for good penetration. |
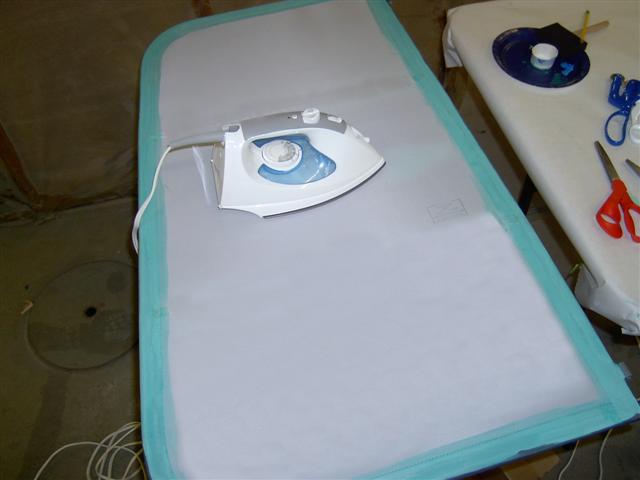
Shrinking second panel all the way to 350F. See notes about the temps. |
Rib stitch 1/2" reinforcing tape. Prepunching stitch holes with sharp
pencil. |
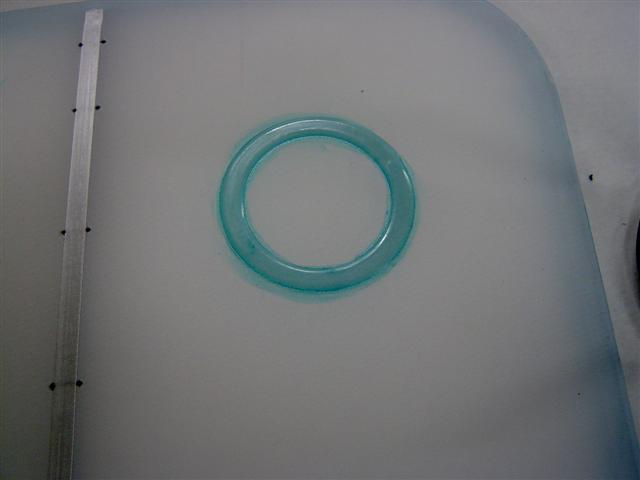
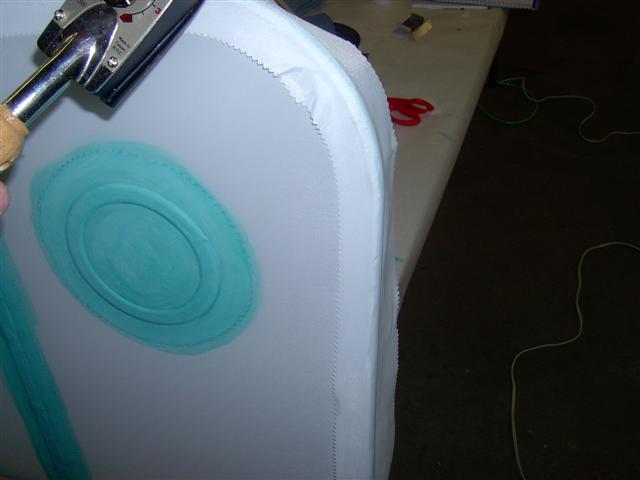
Inpection ring application. |
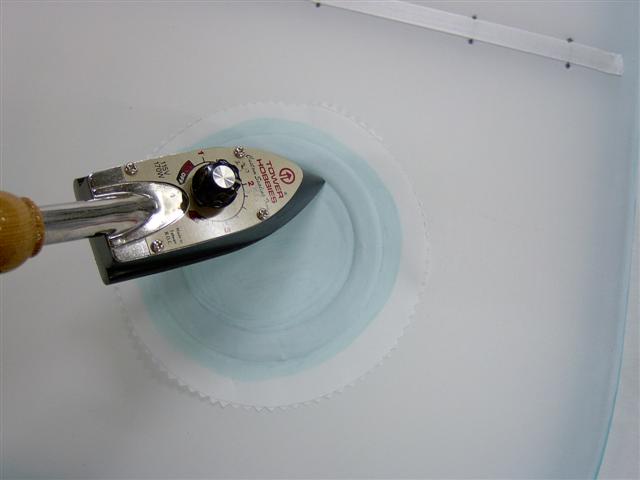
Iron in the inspection ring patch. See notes for more info. |

Inspection ring patch glued down. No shrinking performed. |
More rib stitching. |
Forming loop for modified Seine knot. |
Rib stitching complete. |
Applying tapes over rib stitch. |
Glue down tapes for rib stitch. |

Wipe off excess glue for tapes. |
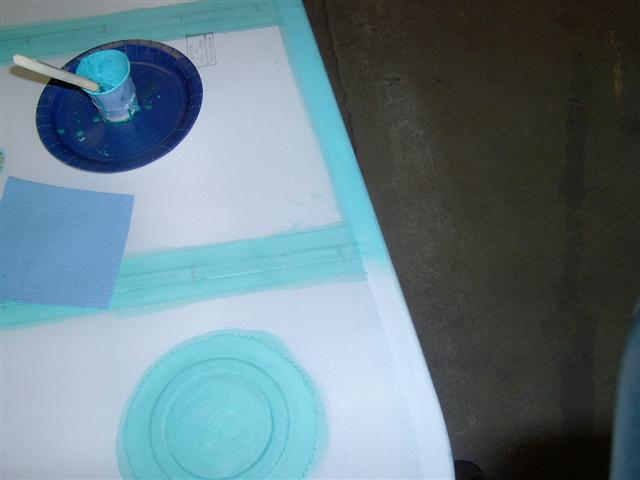
Reinforcing patch. |
Apply glue to fabric and patch. |
Set patch in place. |
Placing perimeter tapes on surface. |
Heat forming and shrinking perimeter tape on radius corner. |
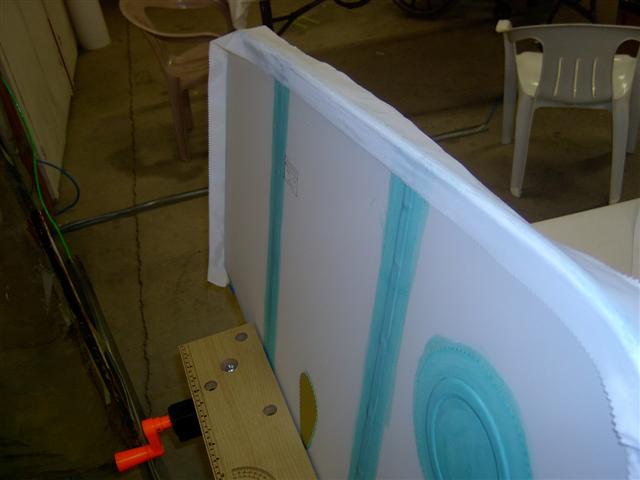
Permiter tape in place. |
Perimeter tapes being glued down. |
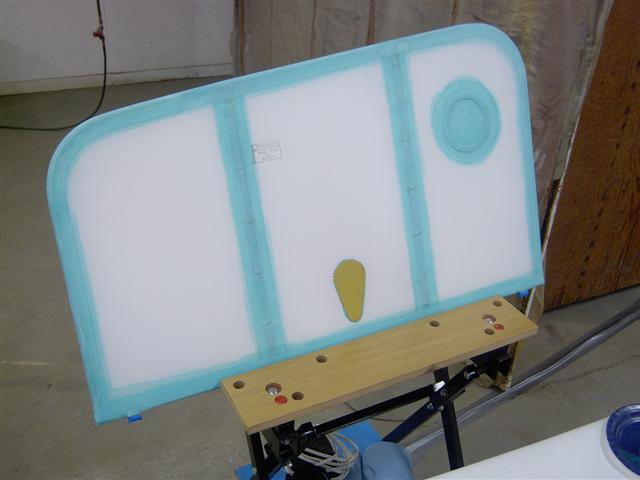
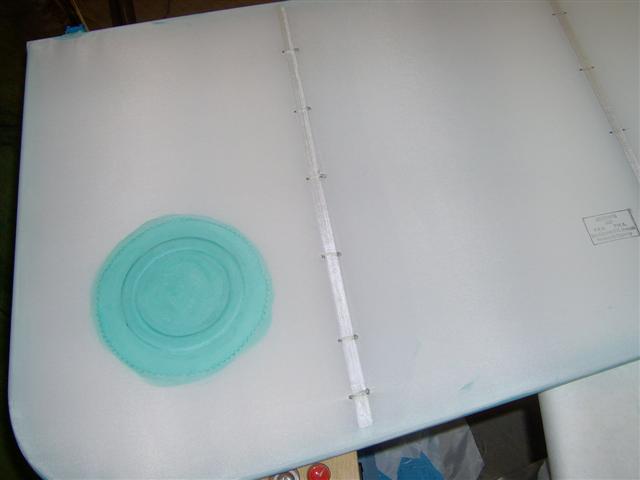
Completed test surface ready for CecoFill. |

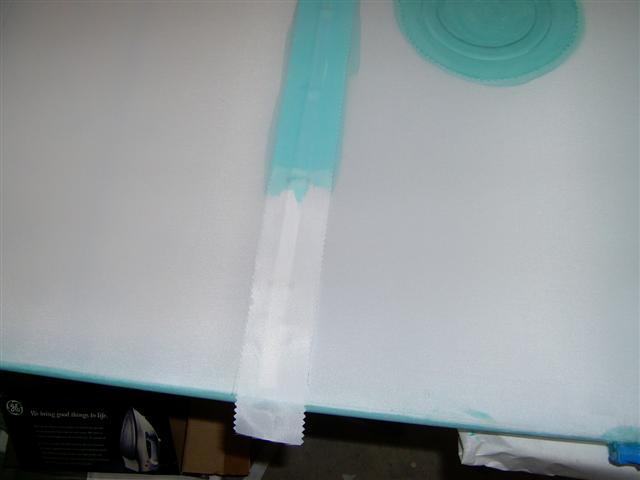
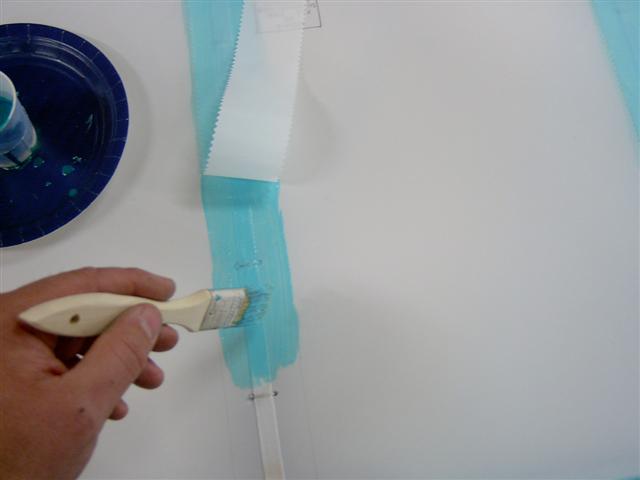
Applying first brush coat of CecoFill Primer / UV blocker / Filler. |
CecoFilled fabric surface after two brush coats and light sanding. |
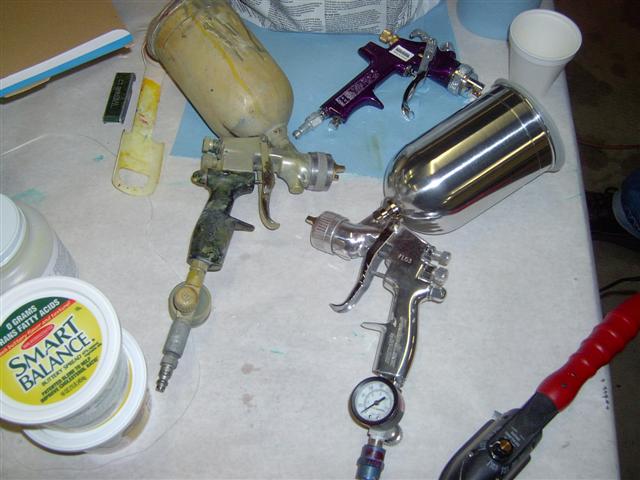
DevilBliss Finishline 3 spray gun with 1.3mm tip. |
Preping surface by air blowing and wiping with terry cloth. |
First spray coat of CecoFill. |

Second spray coat of CecoFill. 2 cross coats are recommended. |

Light sanding with 320 grit open coat paper. Careful here! |
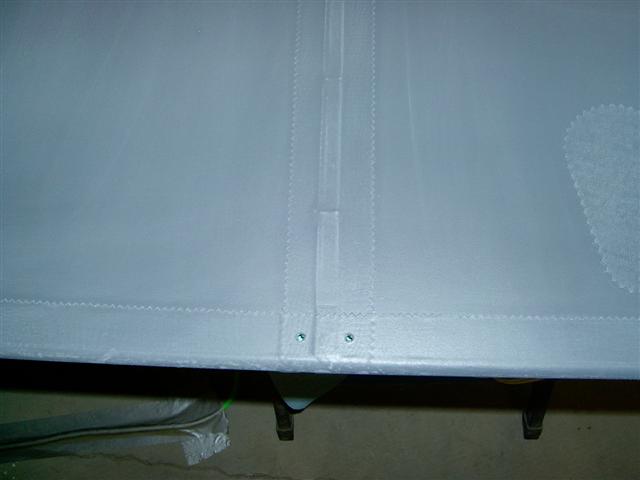
Drain holes burned in with soldering iron. |
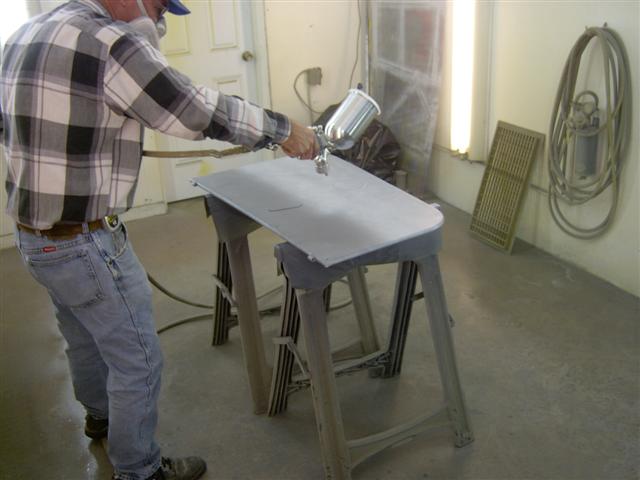
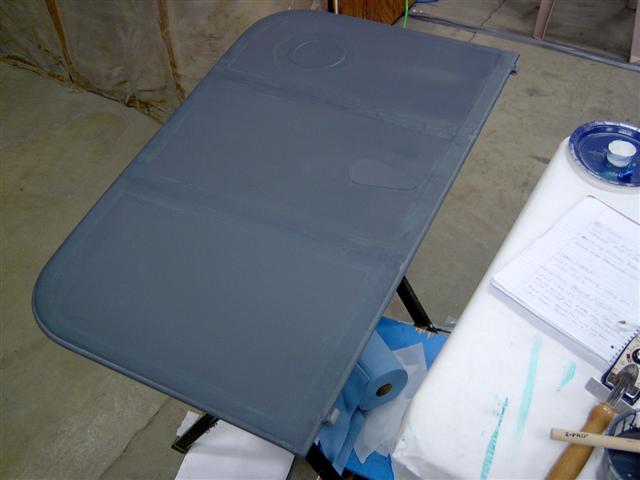
First coat of AFS 2 part Topcoat - Insignia white. |

First coat completed. |
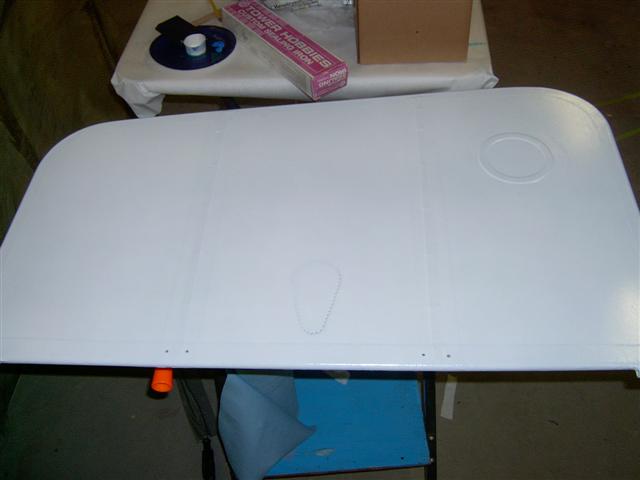
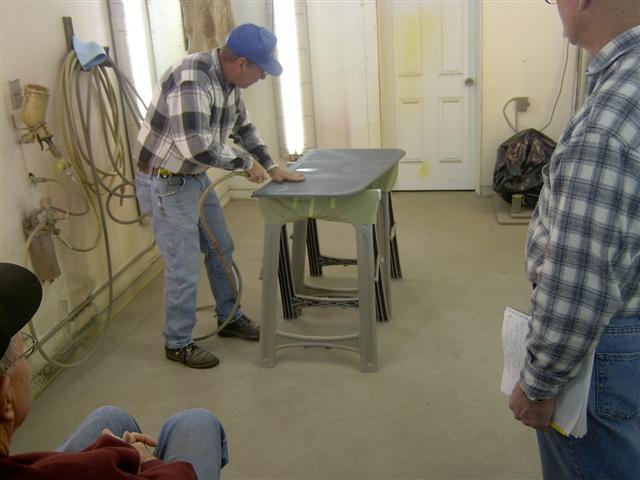
Second coat ( 1 cross coat) completed. |
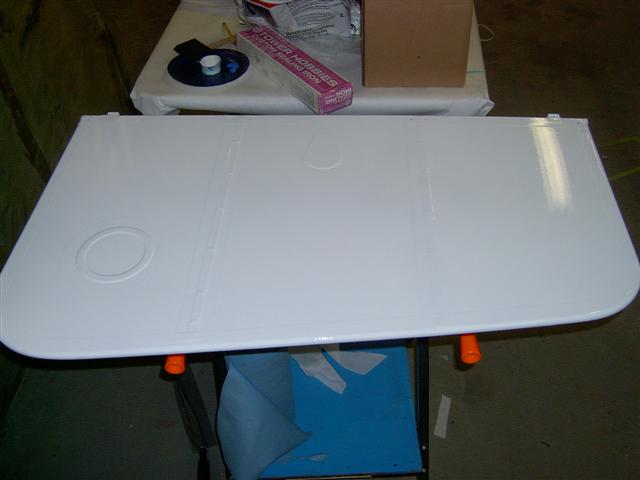
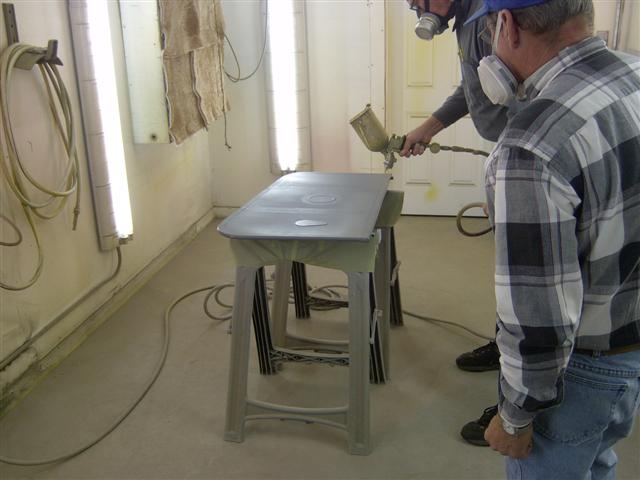
Third coat completed. |
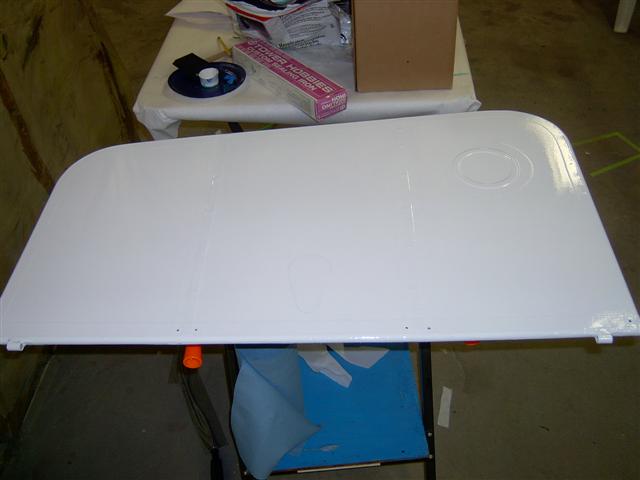
Fourth coat (2nd cross coat) completed. A fifth and final coat was
also applied. The finish is beautiful! |
| |
| |
| |
| |
| |
| |
| |
| |
|